sábado, 28 de febrero de 2015

{*Latest} 50+ Best Whatsapp DPs, Profile Pictures

Earlier people used to change their profile pictures on Orkut, Facebook and other social networking sites but since Whatsapp has launched, this place has been taken by it. Now a days people are busy in changing their Whatsapp DPs(Display Pictures). It shows what they are thinking or trying to express to their friends and love. As we know that a picture says it all. One can share his feeling to anyone by just changing their DPs on the Whatsapp. No one thinks similar so this way no one upload only one type picture. They upload Whatsapp profile pictures according to their need such as some upload cool, funny, romantic sad, geeky Whatsapp DPs while some can upload good, attitude, nerdy, hilarious Whatsapp profile pictures. So I have uploaded all kind of Whatsapp Display Pictures for each type of users. 

Their are several types of categories of Whatsapp Profile pictures such as love, funny, romantic, love, sad, attitude, awesome, hilarious, humor, smile and much more. Choose image according to your need and have fun.

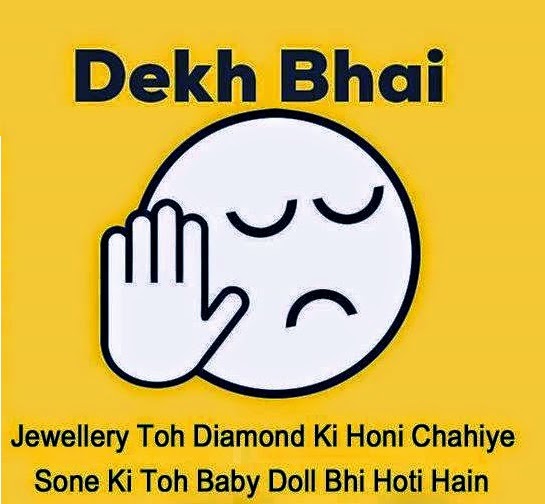
Funny Whatsapp DPs/Display Pictures/Profile Pictures

Whatsapp-Profile-Picture-1
 
Whatsapp-Profile-Picture-2

Whatsapp-Profile-Picture-3

Whatsapp-Profile-Picture-4

Whatsapp-Profile-Picture-5

Whatsapp-Profile-Picture-6

Whatsapp-Profile-Picture-7

Sad Whatsapp DPs/Display Pictures/Profile Pictures

Whatsapp-Profile-Picture-8

Whatsapp-Profile-Picture-9

Whatsapp-Profile-Picture-10

Whatsapp-Profile-Picture-11
Whatsapp-Profile-Picture-12
Whatsapp-Profile-Picture-13
Whatsapp-Profile-Picture-14
Whatsapp-Profile-Picture-15
Whatsapp-Profile-Picture-16


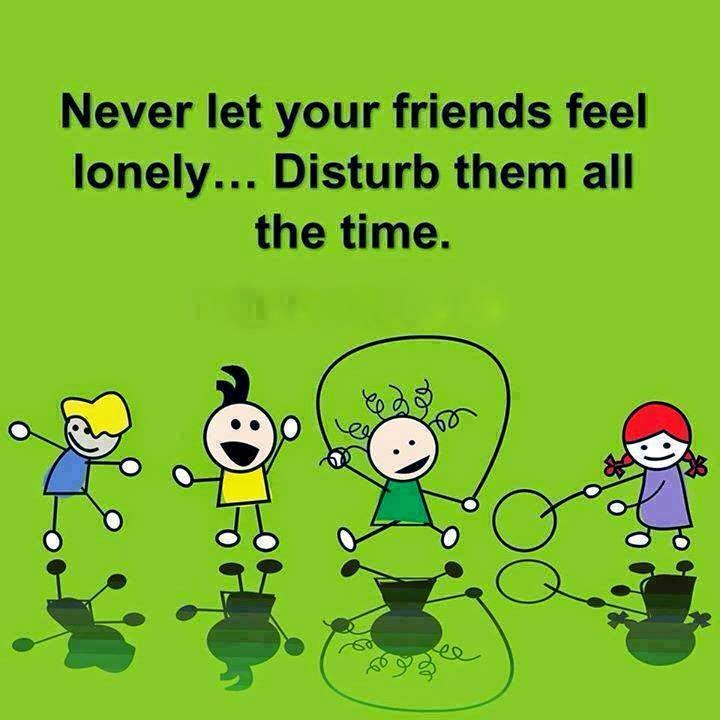
Best Friend Whatsapp DPs/Display Pictures/Profile Pictures

Whatsapp-Profile-Picture-17
Whatsapp-Profile-Picture-18
Whatsapp-Profile-Picture-19
Whatsapp-Profile-Picture-20
Whatsapp-Profile-Picture-21
Whatsapp-Profile-Picture-22

Romantic Whatsapp DPs/Display Pictures/Profile Pictures

Whatsapp-Profile-Picture-23
Whatsapp-Profile-Picture-25
Whatsapp-Profile-Picture-26
Whatsapp-Profile-Picture-27
Whatsapp-Profile-Picture-28
Whatsapp-Profile-Picture-29
Whatsapp-Profile-Picture-30
Choose DPs according to your need and situation and express your feeling to your friends and love. We will update more cool Whatsapp DPs, so stay connected with us.
 
Share:

viernes, 27 de febrero de 2015

[How To] Post Animated GIF Images On Facebook

As we know that Facebook doesn't support animated GIF images. If you will upload a GIF image on Facebook then it will not run like a ordinary image in-spite of this it will look like a simple image only. Earlier people found some ways to upload and show GIFs on Facebook but in some days of internal Facebook found the bug and fixed it. So now you are not able to show animated images directly on the Facebook. The only reason behind not showing of GIF images is that it makes Facebook's site slow which decreases it's quality. So in order to maintain site loading time and quality Facebook team doesn't allow direct uploading of animated GIF images.
How-To-Post-Animated-GIF-Images-On-Facebook
You might be aware that Google+ loads a little slower than Facebook because it supports direct uploading of GIF images.

If you're here then don't worry at the end of this article you will be able to post GIFs on Facebook directly similar like Google+. After using this trick you can easily post animated images on your wall, your friend's wall or in a group. Just follow the step by step guide mentioned below. Be careful and apply each and every step carefully otherwise you will get an error message.

How To Post Animated GIF Images On Facebook

This is an simple to use trick with the use of an third-party website. Follow the steps and apply in order to upload animation on Facebook. 
  • First of all we will need to upload your GIF image on a third-party website so that you can share it easily on Facebook. Simply go to GIPHY website or click here to go. 
  • Now you will have two options either choose your own GIF image or search for existing GIF image on the website. 
  • If you want to upload then simply click on Upload button at the top right corner and then select your desired image and click on Upload GIF (See in the screenshot below).
Upload-GIF-Image

  • You can also upload a GIF image by pasting its url in the field OR Enter A GIF URL.
  • If you want to choose existing image then search for it on the site and open it.
  • Now click on chain icon to copy the URL of the image as shown in the image below.
Click-On-Chain-Icon
 
  • This will copy the URL of the image.
  • Now just go to your Facebook profile or your friend's profile or in a group. Paste the URL that you copied and post it on the Facebook and that's it. This will upload GIF on Facebook, when your friends will click on it then it will be able to run properly.
So this was all about how to upload or post a GIF or animated image on Facebook. If you have any question, query or another working method then feel free to mention it in the comment section below.
Share:

Earn/Make Money By Downloading Apps With Tap Cash

Every Android user downloads apps from Play Store. How will you feel if I say that you can earn some dollars for just downloading apps? No doubt you will feel top of the town. You just need to download some amazing apps and then you can make money easily and redeem it. Isn't it sounds good when you are paid to just download some apps? Everyone wants to earn some extra bucks if the task is simple to do. And you know it very well how easy it is to download apps from play store. Our lives have been smarter with the usage of smartphones and smarter applications in our daily life. Here's an exciting mobile application called "Tap Cash Rewards- Make Money" using it you can earn some money.
Tap Cash
Tap Cash
Tap Cash allows you to earn some bucks as you will download and use the applications from it. We use many different types of applications in our daily life. Daily thousand of apps are downloaded from Play Store. Some of them are games, some related to fitness, some of them are services like alarm clock, flash light etc. All of them have become our daily life usage. If we are paid to download these types of apps then there is not any problem.

Read Also :- 4 Ways To Bypass Online Surveys
 What Is Tap Cash?
Tap Cash is an easy-to-use app that will earn you rewards or real cash rewards. You just need to open Tap Cash to download great games/apps/offers and then you can make money easily. If you think that you will be rich or will able to earn huge amount of money then this app is not for you. You will just able to earn some decent amount of money. One can get some extra bucks from this app. Tap Cash Credits can be redeemed for gift and even PayPal cash rewards. 

Earn Money With Tap Cash

How To Earn Through Tap Cash?
Simply Go to the app store and download the Tap Cash app or click here to download. Now you just need to open the Tap Cash app to download some amazing games such as Temple Run, Cut The Rope, Subway Surfers or some cool apps such as Flipkart, Jabong, Snapdeal, Myntra or any other application available in the Tap Cash to earn real cash or rewards.

What You Will Need?
•    Android powered Smartphone which let you access Play Store.
•    High speed internet.

Step By Step Guide To Earn Real Cash
Here I am providing a complete step by step process to earn rewards and redeem it as real cash. Once you will get the required target points you can redeem it as gift cards or may use PayPal for some real cash.

Step 1: Go to Play Store and download Tap Cash on your Android powered Smartphone.

Note:- You will need high speed internet to operate Tap Cash. If it's not opening try to upgrade your internet plan to 3G. 

Step 2: Enter invitation code 3871986 to get 200 Free Credits Instantly!
Step 3: Install Tap Cash after downloading Tap Cash.
Step 4: Here you will find a complete list of games, applications and offers to earn some points.

Tap Cash Offers
Tap Cash Offers

Step 5: To get the cash rewards install and run apps which you would like to download. You can also complete some other offers like watching videos or ads. 

Install And Run
Install And Run

Step 6: After installing the apps you can redeem your cash rewards as gift cards or as real cash from PayPal.

Redeem
Redeem

VIP Bonus  
You can enjoy 100% VIP Bonus. To avail Bonus offer just verify your Facebook account through mobile phone and bind it with Tap Cash to get it.

VIP Bonus
VIP Bonus

How To Become A VIP?
•    Go to setting.
•    Tap "Bind Facebook Account" to bind Facebook account with Tap Cash.
•    Tap "Become VIP" to verify account through mobile phone.
•    Restart Tap Cash and become a VIP.

Note:- If your Facebook account has been verified through mobile phone, you will become a VIP directly after Binding your Facebook account.
Share:

jueves, 26 de febrero de 2015

Best Stylish Premium Wordpress Themes For Business

Being creative about your website design is something that you need to invest in if you want to make a good impression to your online visitors. That is why using premium WordPress themes is more advantageous in order to obtain professional looking themes for your website. Premium themes for WordPress are usually unique and not generic, with stylish designs that can make your website a standout against your competitors. 

 Best-Stylish-Premium-Wordpress-Themes-For-Business

If you want a bolder, more creative and promising WordPress theme for your site, going for paid WordPress themes is one way of attaining this goal. Here are some of the best styled premium WordPress themes that are created by professional website designers and developers that can make your business website more creative, engaging and professional looking. Click below in order to have a look at premium themes.

1. WP Brilliance
WP-Brilliance

This is a paid WordPress theme that provides a beautiful interface that is loaded with great functionality. It is excellent for a blog site, business site and magazine styled websites. It comes with customizable setting and the layout is highly flexible to accommodate your preferences for customization. It comes with unique design elements that allow Google map embed. 


2. Shutter
This is an elegantly designed premium WordPress theme that is great for photographers, design studio businesses and artists. You can unleash your creativity by using its customizable elements that can bring out unique designs from your images. Shutter is a great theme for building photography portfolio for your business.


3. WP Scribely
WP-Scribely

WP Scribely by SoloStream is a premium WordPress theme that comes with a single layout and page templates. Its stunning visual display makes it a very impressive design for a WordPress theme that is ideal for bloggers and writers. The theme is creatively designed to bring your audiences’ attention on your content. Although it is a single columned theme, it does not come flat and plain. The theme has custom settings that allow you to create beautiful and interesting website designs that can engage your readers to your content. 


4. The Novelist
If you are serious about engaging your website visitors to your content, this premium WordPress theme can serve its purpose of offering its users a responsive portfolio WordPress theme. The theme provides a flat interface, but does not produce a boring effect to your readers. Its theme design is drawn out from a book-like appearance with various templates to choose from. 


5. Alive
This premium WordPress theme comes with a beautiful interface design that can make each web page look “alive” that can mesmerize those viewing it. It comes with animation features that bring more life and engaging appearance to your website pages. It is a WordPress theme powered by Ajax or j Query and its other unique features includes animated navigation menu, custom gallery support, j Query pagination, contact form, image hover effects and a host many other features for that stylish website design.  


6. WP Venus
WP-Venus

Solostream once again provides a stylish WordPress theme that is dedicated in offering a feminine feel and style. The theme lives up to its name that is inspired by the goddess of beauty that seeks to inspire bloggers to share something stylish to their target feminine audience. Its pastel colors are designed to hook your readers to view your content that is displayed in a clearer interface that comes with a soft touch and impressive layout. 


7. Spotlight
If you want to have a stylish WordPress theme that does not overdo its design, Spotlight premium WordPress blog is a good option for you. Its design approach is minimalist, but allows you to highlight your portfolio, content or projects. This premium theme is ideal for personal blogs or when building personal or business portfolios. Its powerful custom panel allows you to enjoy more customization options and it is easy to navigate through the theme in order to explore more options to create your own impressive website designs. 


8. WP Glide
If you have an eye on sliders for your web pages, this premium WordPress theme provides professionally designed feature sliders to showcase your portfolio or content. The layout design is highly flexible, customizable and functional. You can create slides that can engage your online visitors to your business. You can also opt to use this premium WordPress theme to create a stylish magazine portfolio for your website.


You can check more best selling Premium WordPress Themes From SoloStream below :


Share:

miércoles, 25 de febrero de 2015

{*Latest} 10 Free Dofollow Backlinks From High PR Websites

Building dofollow backlinks is one of the essential work related to SEO, if you want to rank your website higher in search engine. And what if they are of high PR, your rankings will simply boost in Google, bing and other search engines. High PR backlinks help blogs and websites to increase their traffic along with ranking. So today in this guide I am having a list of 15 free high PR dofollow websites on which you can build high PR dofollow backlinks in just few minutes.
Latest-10-Free-Dofollow-Backlinks-From-High-PR-Websites
After many days searching I have created this list to help you in getting high pr dofollow backlinks in seconds. Just go through the list and start working on backlinks.

How To Get High Quality Free Dofollow Backlinks From PR Websites

1. Backlink From BlogAdda
  • Go to blogadda.
  • Now register yourself their for new account.
  • Navigate to my account.
  • Their you will see a option Submit Your Blog.
  • Now add all your blog details and click on submit and that's it.
  • You will get a dofollow backlink.
2. Backlink From Codecademy
  • Go to Codecademy.
  • Register for a new account there.
  • Go to your profile and add your website link.
  • That's it. This will be a dofollow backlink from PR7.
3. Backlink From Granta
  • Go to Granta.
  • Register a new account on their website.
  • Fill your profile and add your website link while filling profile.
  • This will be a PR7 backlink.
4. Backlink From OneTab
  • Open your Firefox browser.
  • Now search and install One-Tab extension in your browser.
  • Open your website/blog in your Firefox browser.
  • Click on one tab extension at the top in the right side.
  • It will open a new page, just click on Share as web page.
  • And that's it, you will get a unique on which your backlink will be available.
5. Backlink From Copyrighted
  • Go to Copyrighted.
  • Create a new account there.
  • Now add a content that you own say your website. When filling details, it will ask you to add website URL, just add your website.
  • That's it.
6. Backlink From AllTop
  • Go to Alltop.
  • Now select your category say it's technology then go to tech category.
  • At the bottom of the page you will see a option to add your blog/website.
  • Just add you website details and in few days you will get a email confirmation from them that your site is submitted.
7. Backlink From Indugly
  • Go to Indugly.
  • Register a new account on the website.
  • Add photos from your blog and then the site will give a dofollow backlink by showing url blog/website link on the photos.
8. Backlink From Mozilla
  • Go to Mozilla.
  • Sign up for free Mozilla account.
  • Fill the required details and click on submit.
  • Verify your email in order to activate your account.
  • Now login to your Mozilla account and add your bio with a website's link, that's it.
9. Backlink From Ted
  • Go to Ted.
  • Sign up on Ted website.
  • After activation your account, go to your profile then edit profile.
  • Now scroll down the page and then you will find a link to insert your website.
  • Just add your website or blog and that's it.
10. Backlink From Eventful 
  • Go to eventful
  • Sign up to eventful.
  • Verify your account there.
  • Click on profile button and there you will see a button "Add More Info". Just click on it.
  • Add link which putting your info using : <a href = "http://www.yourwebsite.com"> Your Keyword </a>.
  • That's it, you will get high PR backlink.
Share:

martes, 24 de febrero de 2015

[Solved] Fix Hotspot Shield Not Working/Connecting Problem

 You might be aware about Hotspot shield as you have landed on this article to fix hotspot shield not working problem. Hotspot shield is one of the best rated VPN(Virtual Private Network) software to secure your online presence. It allows you to surf anonymously, unblock any website and hide your online presence. You can use it for your internet safety and privacy. This will secure your browsing, Wi-Fi hotspots, apps, your identity and your IP address to stop unwanted tracking. You can easily unblock any content and service or some social media websites such as Facebook, Skype, YouTube, Flickr and other sites not available in certain countries. 
Fix-Hotspot-Shield-Not-Working-Problem
Also Hotspot Shield Compression saves bandwidth and thus speeds up your browsing speed. It also saves your internet data up to a large extent. 

However on some system people are not able to install it properly due to some reasons. So to solve your problem I have mentioned the reason which causes this error to occur and ways to fix it.

Why I Am Having Hotspot Shield Not Working Error ?

There can be several reasons which causes this error to occur but I have mentioned some most common's one here : 
  • You might be having two or more VPN software installed on your system. At that time all these virtual private networks tries to configure their settings according to them but one or more VPN fails to set up its setting on your system. At that time this error is shown up.
  • You might be having a firewall which is not allowing Hotspot Shield to access traffic. Always be sure that your firewall is allowing HSS to access internet and traffic.
  • Sometime your antivirus software doesn't allow HSS to access traffic then HSS will show this error. Always be sure that your antivirus is allowing hotspot shield to access internet.
These are some of the most common reasons which you can check before going to the below mentioned tip to solve hotspot shield not working problem.

How To Fix Hotspot Shield Not Working Problem

This is a simple tip which you can use in order to run your HSS properly.
  • First of all download and install Hotspot Shield on your system and then it will open Hotspot Shield website in your browser, just copy the address from the address bar and save in anywhere on your system say Notepad.
  • Now if your having problem in connecting then just navigate to this path : Control Panel > Network Settings > LAN (Local Area Connection) > Properties
  • Now in the General tab you will see an option, "Hotspot Shield Helper Driver", just uncheck the box in-front of it and save the settings.
  • Now open your internet browser again and paste the address that you copied and hit enter.
  • Just try to connect your HSS again, hope it will start working.
So this was all about how to solve hotspot shield doesn't work problem. If you are still not able to connect it, then feel free to leave a comment below.
Share:

lunes, 23 de febrero de 2015

[Solved] Fix Windows Update Error 0x80070103 In Windows 8/NT

You might have come across this error "Windows Update Error 0x80070103" in Windows 8 or Windows NT while updating your system to new updates. This is one of the most common issue which occurs when a user tries to install updates in their Windows 8 or Windows NT. If you're one of those users who is facing this error then don't worry after reading this guide you will be able to remove it easily. I have mentioned all the reasons which causes this error to occur. Read the guide carefully and follow the steps mentioned.
Fix-Windows-Update-Error-0x80070103-In-Windows-8-NT

Error Codes Which Occur During This Windows Update Error

There are mainly two error codes which are shown up by your windows and they are maintained also on the official website of Microsoft. 
  • WindowsUpdate_80070103
  • 0x80070103

Why I Am Having Windows Update Error 0x80070103 ?

There can be several reasons that can cause this problem but some of the most common reasons I have mentioned here :
  • You might be trying to install a driver which already exists on your system, at that time this problem will occur.
  • While sometime you are trying to install a driver which is less compatible with its version already installed on your system.

How To Fix/Solve Windows Update Error 0x80070103

Just follow the step by step process to get rid of this error :
  • Search for control panel on your system or press Window Key+ R and then type "Control Panel" and hit enter.
  • This will open control panel on your window. Now click on "Windows Update".
  • Now If you have important updates to hide, click the link that says “important updates are available”.
  • If you have optional updates to hide, click the link that says “optional updates are available”. As you can see in the screenshot below there is written "5 optional updates are available".
Optional-Windows-Update
  • Now select the update which you want to hide, right click on it and click on "Hide Update". Do this for all those updates which you want to hide.
Now we will need to disable auto-update of driver installation, just follow the steps to disable auto-update of driver installation.
  • Go to your desktop, right-click on My computer and select properties.
  • Now from the left menu click on "Advance system settings". It will open System Properties Window.
  • In the System Properties windows select "Hardware" and the tap on the "Device Installation Settings".
  • Now select “No let me choose what to do” and then select “Never install driver software from Windows Update”. Click Save Changes button to save the settings and that's it.
After following all the steps mentioned. you will be able to solve this error. In-spite of this if you are not able to solve this then leave a comment below or Search the forums or ask a question on the Microsoft Community website.
Share:

[How To] Change/Refresh Facebook Homepage Login Screen

Are you fed up from that blue Facebook home page login screen? Did you ever think of changing it? If not then don't worry I have found a trick to change it and make it looks more better. If you are using that blue theme from years and now it looks boring to you then just change it with the awesome working trick mentioned in this article. Today after reading this article you will come to know that how to change Facebook homepage login screen easily with the use of just an extension called FB Refresh. This is one of the widely used and most trustable extension available to change facebook login screen in your browser.
Change Refresh Facebook Homepage Login Screen
If you're bored with your facebook login screen then just refresh it with one of the coolest extension FB refresh. Follow the steps mentioned below :

How To Change Facebook Homepage Login Screen In Google Chrome

  • First of all you will need to install FB Refresh extension on your Google Chrome browser. Click Here to install it in your browser.
  • The above link will open Google Chrome store, just click on Add To Chrome and then it will take some time in installing, till then wait.
  • When the installation process is complete, navigate to the bar at the right hand top corner of your Chrome browser. Click on it, then select More Tools and then click on Extensions.

FB Refresh Extension
  • There you will see your installed FB Refresh. Click on options below the FB Refresh extension. Now you will see a new windows (Check The Screenshot Below).
FB Refresh Extension New Window
  • At left side you will see a option "Theme", click on that and then you can see a list of available themes for Facebook login screen. 
  • Choose the theme which you want to apply and click on "Select". It will set that theme to your current Facebook homepage theme.
  • You can choose your own theme also, just go to "Custom Theme" option and choose your own desired image, upload it and then it will be your current Facebook login screen.
Note:- When uploading images, all images are uploaded to the public image hosting website imgur.com. So please be aware that your images could potentially be viewed by anyone on the internet. FB Refresh offer no guarantee as to the privacy of your images. They are also in no way affiliated with imgur.com

So it was all about how to change your Facebook login screen or homepage theme. FB Refresh is one of the simplest extension available to change login screen. It is freely available, anyone can install it and can use it. But remember it's only available for Google Chrome browser only. If you have any doubt or query then feel free to mention a comment below. I will reply as soon as possible.
Share:

Popular Posts

Con la tecnología de Blogger.